
TL;DR
In the reviewed H2000 5–10t manual copy, the H2000 meter is at printed page 30, Figure 2.3-1, and the H2001 meter is at printed page 31, Figure 2.3-2. Match the truck, engine, serial coverage, and manual revision before using either locator. The copy describes behavior for charging, oil-pressure, and KOMATSU-only water-deposit indicators; HELI America says to report faults and keep a truck out of operation until corrected.
Table of Contents
- Confirm the truck before choosing a meter figure
- Locate the H2000 or H2001 combination-meter figure
- Read the three indicator behaviors stated in the manual text
- Stop, report, or follow the specific operator check in the matching manual
- Send one evidence packet to HELI service or a parts supplier
- Conclusion
- References
Confirm the truck before choosing a meter figure
A HELI forklift warning light lookup starts with the truck and its operator manual. The reviewed H2000 5–10t copy is a third-party reference.
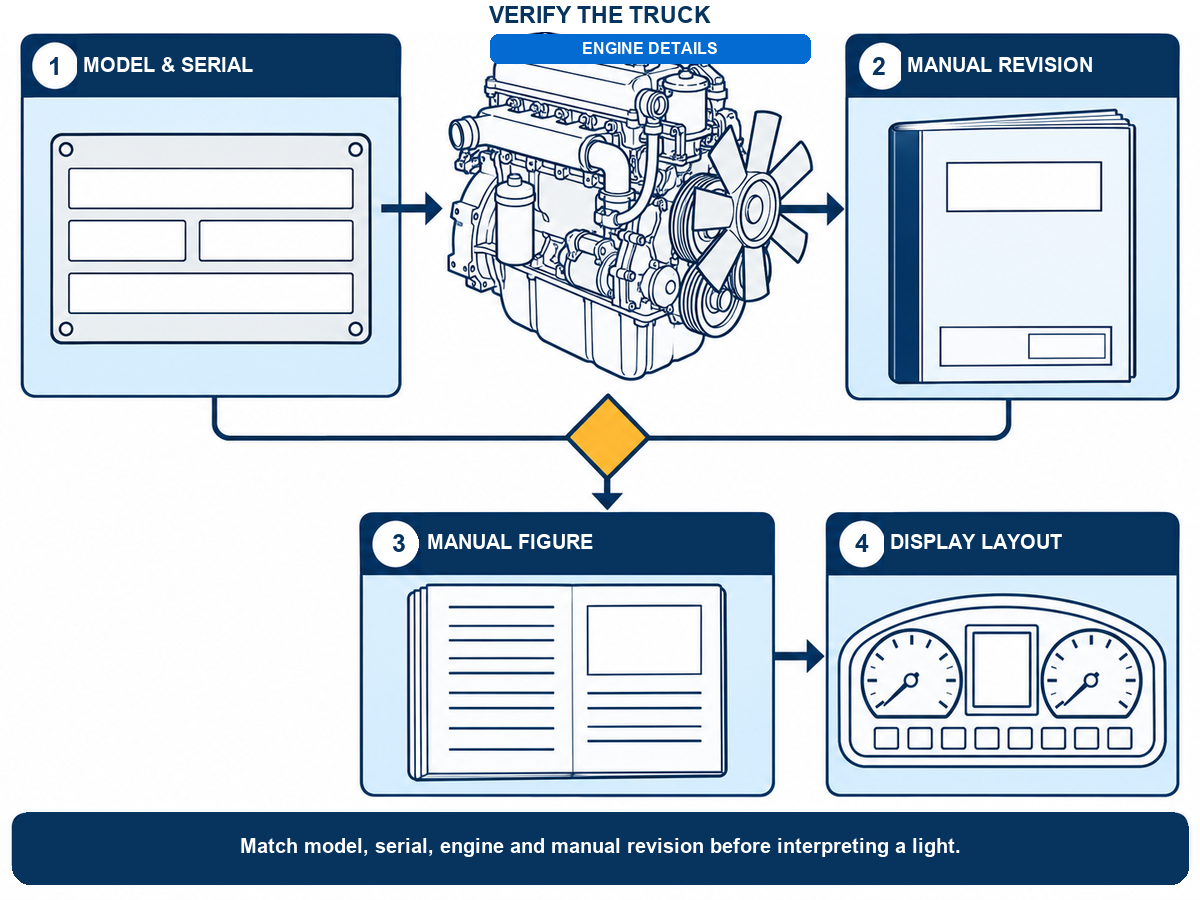
Before using a figure, record:
- Model and series: copy the full designation from the data plate.
- Serial number: include every character; do not infer a range from capacity.
- Engine: record its maker and model, especially for a diesel configuration.
- Manual: note the title, revision or publication details, and any serial coverage.
Capacity is a starting clue, not a coverage decision. The cited manual covers H2000 series 5–10t trucks, while its indicator text separately names diesel configurations and its figures show H2000 and H2001 layouts. Use the model, engine, serial coverage, and manual revision together. A matching HELI name alone does not prove an H2000 illustration covers another series, engine, or serial range. If coverage is unclear, ask HELI service or a dealer to confirm the applicable manual before interpreting the lamp.
Evidence capsule: The available manual is titled for H2000 series trucks from 5 to 10 tonnes, and its indicator guidance is tied to that manual. The source copy is hosted by a third party. Use the truck’s identifiers and the applicable HELI documentation to establish coverage before applying its figure or response instructions.
Locate the H2000 or H2001 combination-meter figure
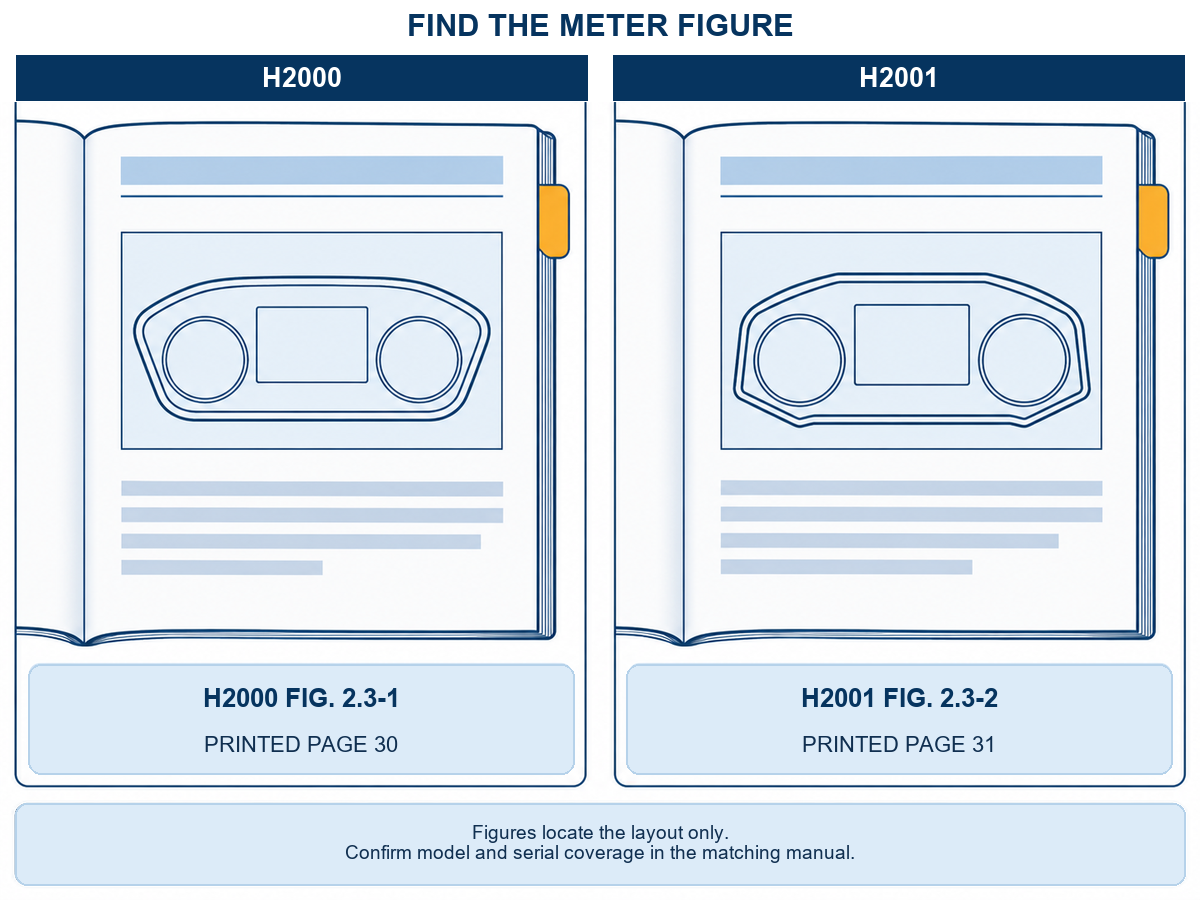
Once the manual matches the truck, use its printed page number and figure caption to find the corresponding meter layout. In the reviewed H2000 5–10t copy, the two locators are:
| Manual layout | Printed page | Figure | What to compare |
|---|---|---|---|
| H2000 combination meter | 30 | Fig. 2.3-1 | The full meter layout and its labels |
| H2001 combination meter | 31 | Fig. 2.3-2 | The full meter layout and its labels |
These are printed page numbers in the PDF copy, which may differ from a viewer’s page counter. Confirm the caption on the page before using the figure, and note both numbers if they differ so service can find the same image. The locator identifies where to look; it does not establish that the figure applies to every truck marketed under the HELI name. For a service request, include the printed page and figure number in the note; an unlabeled panel photo does not show which manual illustration you checked.
Use the complete figure rather than matching an isolated shape. Compare the layout and surrounding labels with the truck display, then read the numbered manual text for the same indicator. The available extract does not provide a complete verified icon legend, so shape alone cannot establish a warning’s meaning.
A label in a figure is not, by itself, an operating instruction. If the matching diagram does not show the lamp clearly, or if the panel differs from the illustration, keep the meaning unresolved and send a full-display photo with the model and serial details to HELI service or a qualified dealer.
Evidence capsule: The reviewed third-party-hosted H2000 5–10t manual copy captions the H2000 combination-meter layout as Figure 2.3-1 on printed page 30 and the H2001 layout as Figure 2.3-2 on printed page 31. Those page and figure references identify the cited manual copy; they do not stand in for a universal HELI dashboard chart.
Read the three indicator behaviors stated in the manual text
The H2000 copy explains three lamp behaviors in its numbered text. Compare the key-switch ON state with what happens after the engine starts, and keep the KOMATSU-only entry within its stated scope.
| Indicator and section | At first key-switch ON and after starting | If it lights while running | Scope |
|---|---|---|---|
| Charging indicator, §2.2.5 | It lights at first ON and should go out after the engine starts. | The manual says the charging circuit may be wrong and directs the operator to stop and check it. | Use only with the matching H2000 manual. |
| Oil-pressure alarm lamp, §2.2.6 | It lights at first ON and should go out after the engine starts. | The manual identifies low lubricating oil pressure and directs the operator to stop and check the lubrication system. | An illuminated oil-pressure lamp is not, by itself, a failed-part diagnosis. |
| Water-deposit indicator, §2.2.7 | Before starting, the manual says the indicator is on at first key-switch ON. | While running, the manual says water is above the alarm level and directs draining it. | The entry is limited to the KOMATSU diesel configuration. |
Keep each figure locator tied to its numbered text section in your notes. The figure helps identify the panel label; the matching section gives the stated operating behavior. Recording both lets service check the same entry rather than relying on a stand-alone icon photo and confirms the manual’s serial coverage.
The meter figures also label an air-cleaner lamp and a water-temperature indicator. The reviewed extract does not establish their trigger, threshold, or operator response, so do not fill those gaps from another HELI series or a generic icon chart.
The manual identifies the water-temperature meter as a gauge for engine coolant and labels a water-temperature indicator separately in the figures; the extracted pages give no trigger or threshold for that indicator. When reporting a water-related display, tell service whether the observation was a gauge reading, a lit indicator, or both. The manual also names a neutral indicator, a status label distinct from the three lamp behaviors summarized above.
To classify a lamp, record the key-switch position, whether the engine has started, and whether the lamp goes out or remains lit. Compare that sequence with the numbered entry for the same indicator. The extract describes first-ON illumination separately from a lamp that becomes lit while the engine is working. Its charging and oil-pressure entries describe first-ON and after-start behavior; its water-deposit entry describes water above the alarm level during operation and is limited to KOMATSU diesel. Keep those cases separate, and do not infer a failed component from the lamp alone.
The reviewed copy does not establish warning colors, thresholds, fault-code meanings, or which component has failed; an indicator label alone cannot identify a part number. If the matching figure and text do not identify a warning for the truck, ask HELI service to confirm the applicable manual.
Evidence capsule: Sections 2.2.5–2.2.7 of the reviewed H2000 5–10t manual copy describe the charging, oil-pressure, and water-deposit indicator behaviors. The water-deposit entry is specific to a KOMATSU diesel configuration. The figures provide additional labels, but the reviewed evidence does not document a response for every labeled lamp.
One more thing
When the applicable operator manual or qualified service has confirmed that a replacement is needed, our forklift parts sourcing service can help match the request against the truck model, serial range, engine, and applicable parts reference. A warning symbol alone does not identify a failed part or confirm fitment. Share the truck details for parts sourcing.
Stop, report, or follow the specific operator check in the matching manual
When an unfamiliar warning appears, use the applicable operator manual and your site’s reporting process. HELI America says to report faults and keep the truck out of operation until they are corrected.
Stop and report: Do not return a truck with a reported fault to operation until the fault is corrected. Service work belongs to trained and authorized servicemen; call one when inspection shows that adjustment or replacement is needed.
For a warning not covered by the three entries below, capture the exact display and operating condition rather than borrowing a reset, shutdown, or drain step from another HELI model. The extract does not document actions for every label. HELI America’s Safety-Training guidance also says to stop operating after a fault is found, report the condition, and keep the truck out of operation until it has been repaired. An unresolved warning belongs with trained service. For the charging and oil-pressure lamps, the matching H2000 text directs stopping and checking the named circuit or lubrication system when the lamp remains on while the engine is running. Follow that instruction through the personnel authorized for the work.
Keep the diesel sedimenter procedure within its stated scope
HELI America’s sedimenter instructions apply to the matching diesel sedimenter indicator and configuration. The listed sequence is:
- First: Stop the engine.
- Drain: Loosen the drain plug by 4–5 turns.
- Pump: Press the priming pump until water is discharged.
- Leak check: Fasten the plug, then press the pump several times to check for fuel leakage.
- Restart: Start the engine and confirm that the indicator is off.
Do not transfer these steps to a charging, oil-pressure, temperature, air-cleaner, or other lamp. Use the procedure only when the applicable manual confirms the same sedimenter arrangement and the check is within the operator’s authorized scope. If the lamp stays on, fuel leaks, or the instruction does not match the truck, stop and refer it to trained service.
A warning identifies a condition to address under the matching manual; it does not prove which component failed. If the prescribed operator check does not resolve the warning, leave diagnosis and repair to qualified service.
Evidence capsule: HELI America’s maintenance guidance says faults should be reported and the truck kept out of operation until corrected; it assigns service work to trained and authorized personnel. Its five-step sedimenter procedure is specific to the matching diesel sedimenter indicator and should not be generalized to other warning lamps.
Send one evidence packet to HELI service or a parts supplier
After the correct manual or qualified service review identifies a next step, send one packet that lets the recipient confirm the truck before interpreting the warning or recommending a replacement.
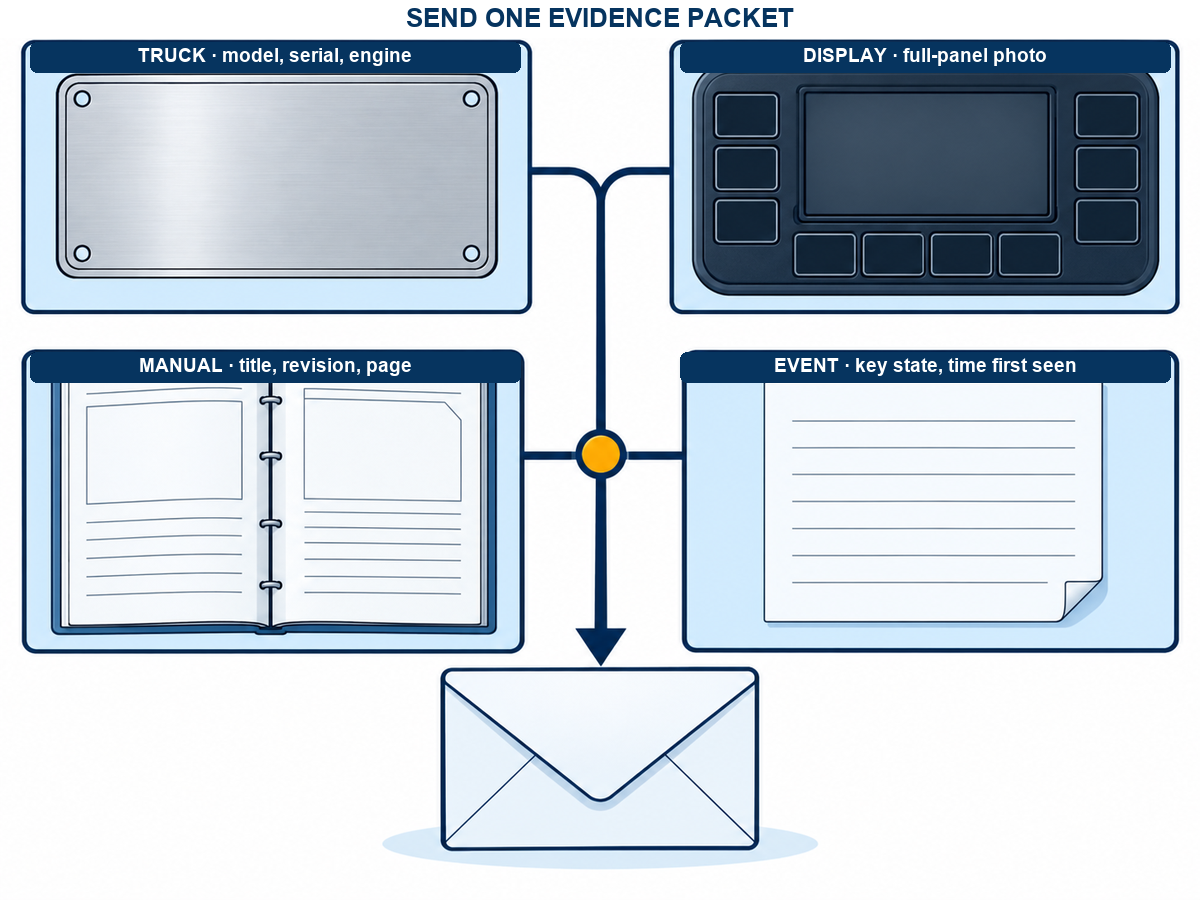
- Truck and engine: provide the full model or series and data-plate serial number. Add the engine maker and model, or state that they are unknown.
- Manual: include the title, revision or publication details, plus the page or figure checked.
- Warning: attach a photo of the complete display with any visible text or code.
- Event and action: state when the warning appeared and what the truck was doing; include the exact manual check taken and whether the light stayed on.
Put the nameplate details in the message body even when attaching a data-plate photo; text remains readable if an image is forwarded or resized. Include one uncropped photo of the full instrument panel so the recipient can see the indicator in relation to the meter layout, then add a close-up separately if more detail is needed. Ask HELI service or the dealer to confirm that the manual applies to the model, serial range, and engine. If a replacement is recommended, ask the supplier to verify the part against the truck identifiers and applicable parts reference. A warning name or dashboard photo alone does not confirm fitment.
You can use HELI forklift parts as a starting point for a parts inquiry once a replacement need has been confirmed. Include the evidence packet with the request; the brand page does not diagnose a warning or establish that a part fits a specific truck.
A concise message could read: "Please confirm whether the attached manual and indicator reference apply to our HELI truck. Model/series: [ ]; serial: [ ]; engine: [ ]; manual title/revision: [ ]. I attached a photo of the full display and any code. Please confirm the stated operator action. If a replacement is needed, verify the parts reference against these truck details."
Conclusion
Match the truck’s model and serial range, plus its engine and manual revision, before using a HELI warning-light figure. The reviewed H2000 copy gives useful page locators and three specific lamp behaviors. Follow the instruction for the confirmed manual, report unresolved faults, and leave diagnosis or parts fitment to qualified service when the evidence does not settle the next step. Keep the cited manual page and observed light state with the service record to support any later parts-reference check.
That distinction matters because the manual copy explains only selected indicators and leaves other labels without a verified response. If the truck or warning falls outside those documented cases, mark the meaning unresolved, report the fault, and get qualified service confirmation. Discuss parts only after the condition and application are established, rather than using a part inquiry to diagnose the specific truck.
References
- HELI America Inc. (n.d.). Inspection and maintenance. https://www.heliforkliftamerica.com/InspectionMaintenance/index.aspx
- HELI. (n.d.). H2000 series forklift trucks operator’s manual: 5 t to 10 t [Third-party-hosted PDF copy]. https://sd652bdd95dd972a2.jimcontent.com/download/version/1648886958/module/11670105372/name/Heli%20H2000%205-10t%20Forklift%20Trucks%20Operator%27s%20Manual%20PDF.pdf
- HELI America Inc. (n.d.). Safety-Training. https://www.heliforkliftamerica.com/SafetyTraining/index.aspx
Last reviewed and updated: October 2026. Author: Kingstream team. For tailored guidance, contact our team.