
TL;DR
Replace a forklift clutch disc in about a day with basic hand tools: read the wear signals, confirm the disc by spline count and outer diameter, then swap it with the no-transmission slide-bolt method.
Abstract
This step-by-step guide covers how to diagnose a worn clutch disc, identify the correct replacement by OEM spec (spline count, outer diameter, hub type), and install it using the no-transmission-removal slide-bolt method, grounded in TCM and Toyota factory service-manual values.
Key Takeaways
- Diagnose wear by four signals: slipping, burning smell, high pedal engagement, hard shifting.
- Confirm the disc by spline count and outer diameter. A wrong-spline disc will not fit.
- TCM 2-3t-class disc spec: 275 mm OD / 175 mm ID / 7.2 mm thick; slide-bolt torque 10.9-12.1 kg-m.
- Toyota CL-17 wear limits: minimum rivet depth 0.3 mm; disc runout max 0.8 mm.
- A clutch disc is a wear item with no fixed replacement interval; replace on symptoms, not on a fixed schedule.
- Kingstream backs OEM-genuine parts with a 12-month warranty, OEM-equivalent 6 months, aftermarket 3 months.
Table of Contents
- Abstract
- Key Takeaways
- Before You Start: Recognizing Clutch Disc Wear and Gathering Your Tools
- Step 1: Identify the Correct Clutch Disc (Spline Count, Outer Diameter, Hub)
- Step 2: Prepare the Clutch With the No-Transmission Slide-Bolt Method
- Step 3: Remove the Clutch Cover and Disc
- Step 4: Install the New Disc and Torque to Spec
- Step 5: Adjust the Pedal and Test for Slip
- Forklift Clutch Disc Troubleshooting: Top 5 Problems
- How Long Does a Forklift Clutch Disc Last, and What Does Replacement Cost?
- Further Reading
- FAQ
- Conclusion
- References
Before You Start: Recognizing Clutch Disc Wear and Gathering Your Tools
A worn forklift clutch disc gives four signals before it fails: slipping under load, a burning smell, a high pedal engagement point, and hard shifting.
Signs your clutch disc is worn
Slipping is the decisive signal, confirmed by the stall test: brakes applied, first gear, engine RPM raised. Engine revs without motion means the forklift clutch disc is not gripping. A burning smell follows, and the pedal engages higher as the facing thins. Hard shifting and grinding come last.
| Symptom | Likely cause | Check |
|---|---|---|
| Slipping under load | Worn friction material | Stall test |
| Burning smell | Overheated disc | Facing glazing |
| High pedal engagement | Thin friction facing | Pedal free travel |
| Hard shifting or grinding | Disc not releasing | Gear engagement at idle |
Our shop stocks 15 clutch disc SKUs; diagnosis comes first.
Tools you’ll need
Planning a forklift clutch disc replacement? A basic shop box is enough.
- Socket set and click-type torque wrench. Staged torqueing needs a set value.
- Slide-bolt/spacer kit. The no-transmission-removal method depends on it.
- Clutch alignment tool. Centers the disc during cover installation.
- Work lamp and magnetic parts tray. Bell-housing cavities swallow fasteners.
- Assembly grease. For splines and the release bearing.
Dry vs wet clutch: does this guide apply?
The steps below apply to a manual-transmission truck with a dry single-plate friction clutch (TCM, n.d.). Power-shift and automatic trucks use wet multi-pack clutches.
Evidence: Dry single-plate friction clutches serve manual-transmission internal-combustion trucks; power-shift and automatic trucks use wet multi-plate packs, and electric trucks have no manual clutch. On a wet pack, holding a stall past 15 seconds or crossing 230°F roughly halves friction life, so a slipping pedal burns the whole pack, not one disc (Industrial Monitor Direct, n.d.).
Step 1: Identify the Correct Clutch Disc (Spline Count, Outer Diameter, Hub)
The correct forklift clutch disc is defined by spline count, outer diameter, and hub type, not by part number alone (TCM, n.d.). Contrary to what a quick parts lookup assumes, a close part number and a matching outer diameter do not guarantee a seat. Two discs for the same truck can carry different codes; one wrong measurement and the disc will not seat.
Why the part number alone isn’t enough
A part number is a catalog key, not a fitment guarantee. Manufacturers revise the hub bore and spline count across production runs while keeping the outer diameter close, so one friction size fits one truck and not another. Verify four things before ordering: spline count, outer diameter, hub type, and the serial or production date (TCM, n.d.).
How to measure OD and count splines
Measure the forklift clutch disc outer diameter across the friction face with calipers. Count the internal splines on the hub bore that mate with the transmission input shaft. Confirm the hub type. Note the stamped serial and production date; both let a supplier cross-check the build (TCM, n.d.).
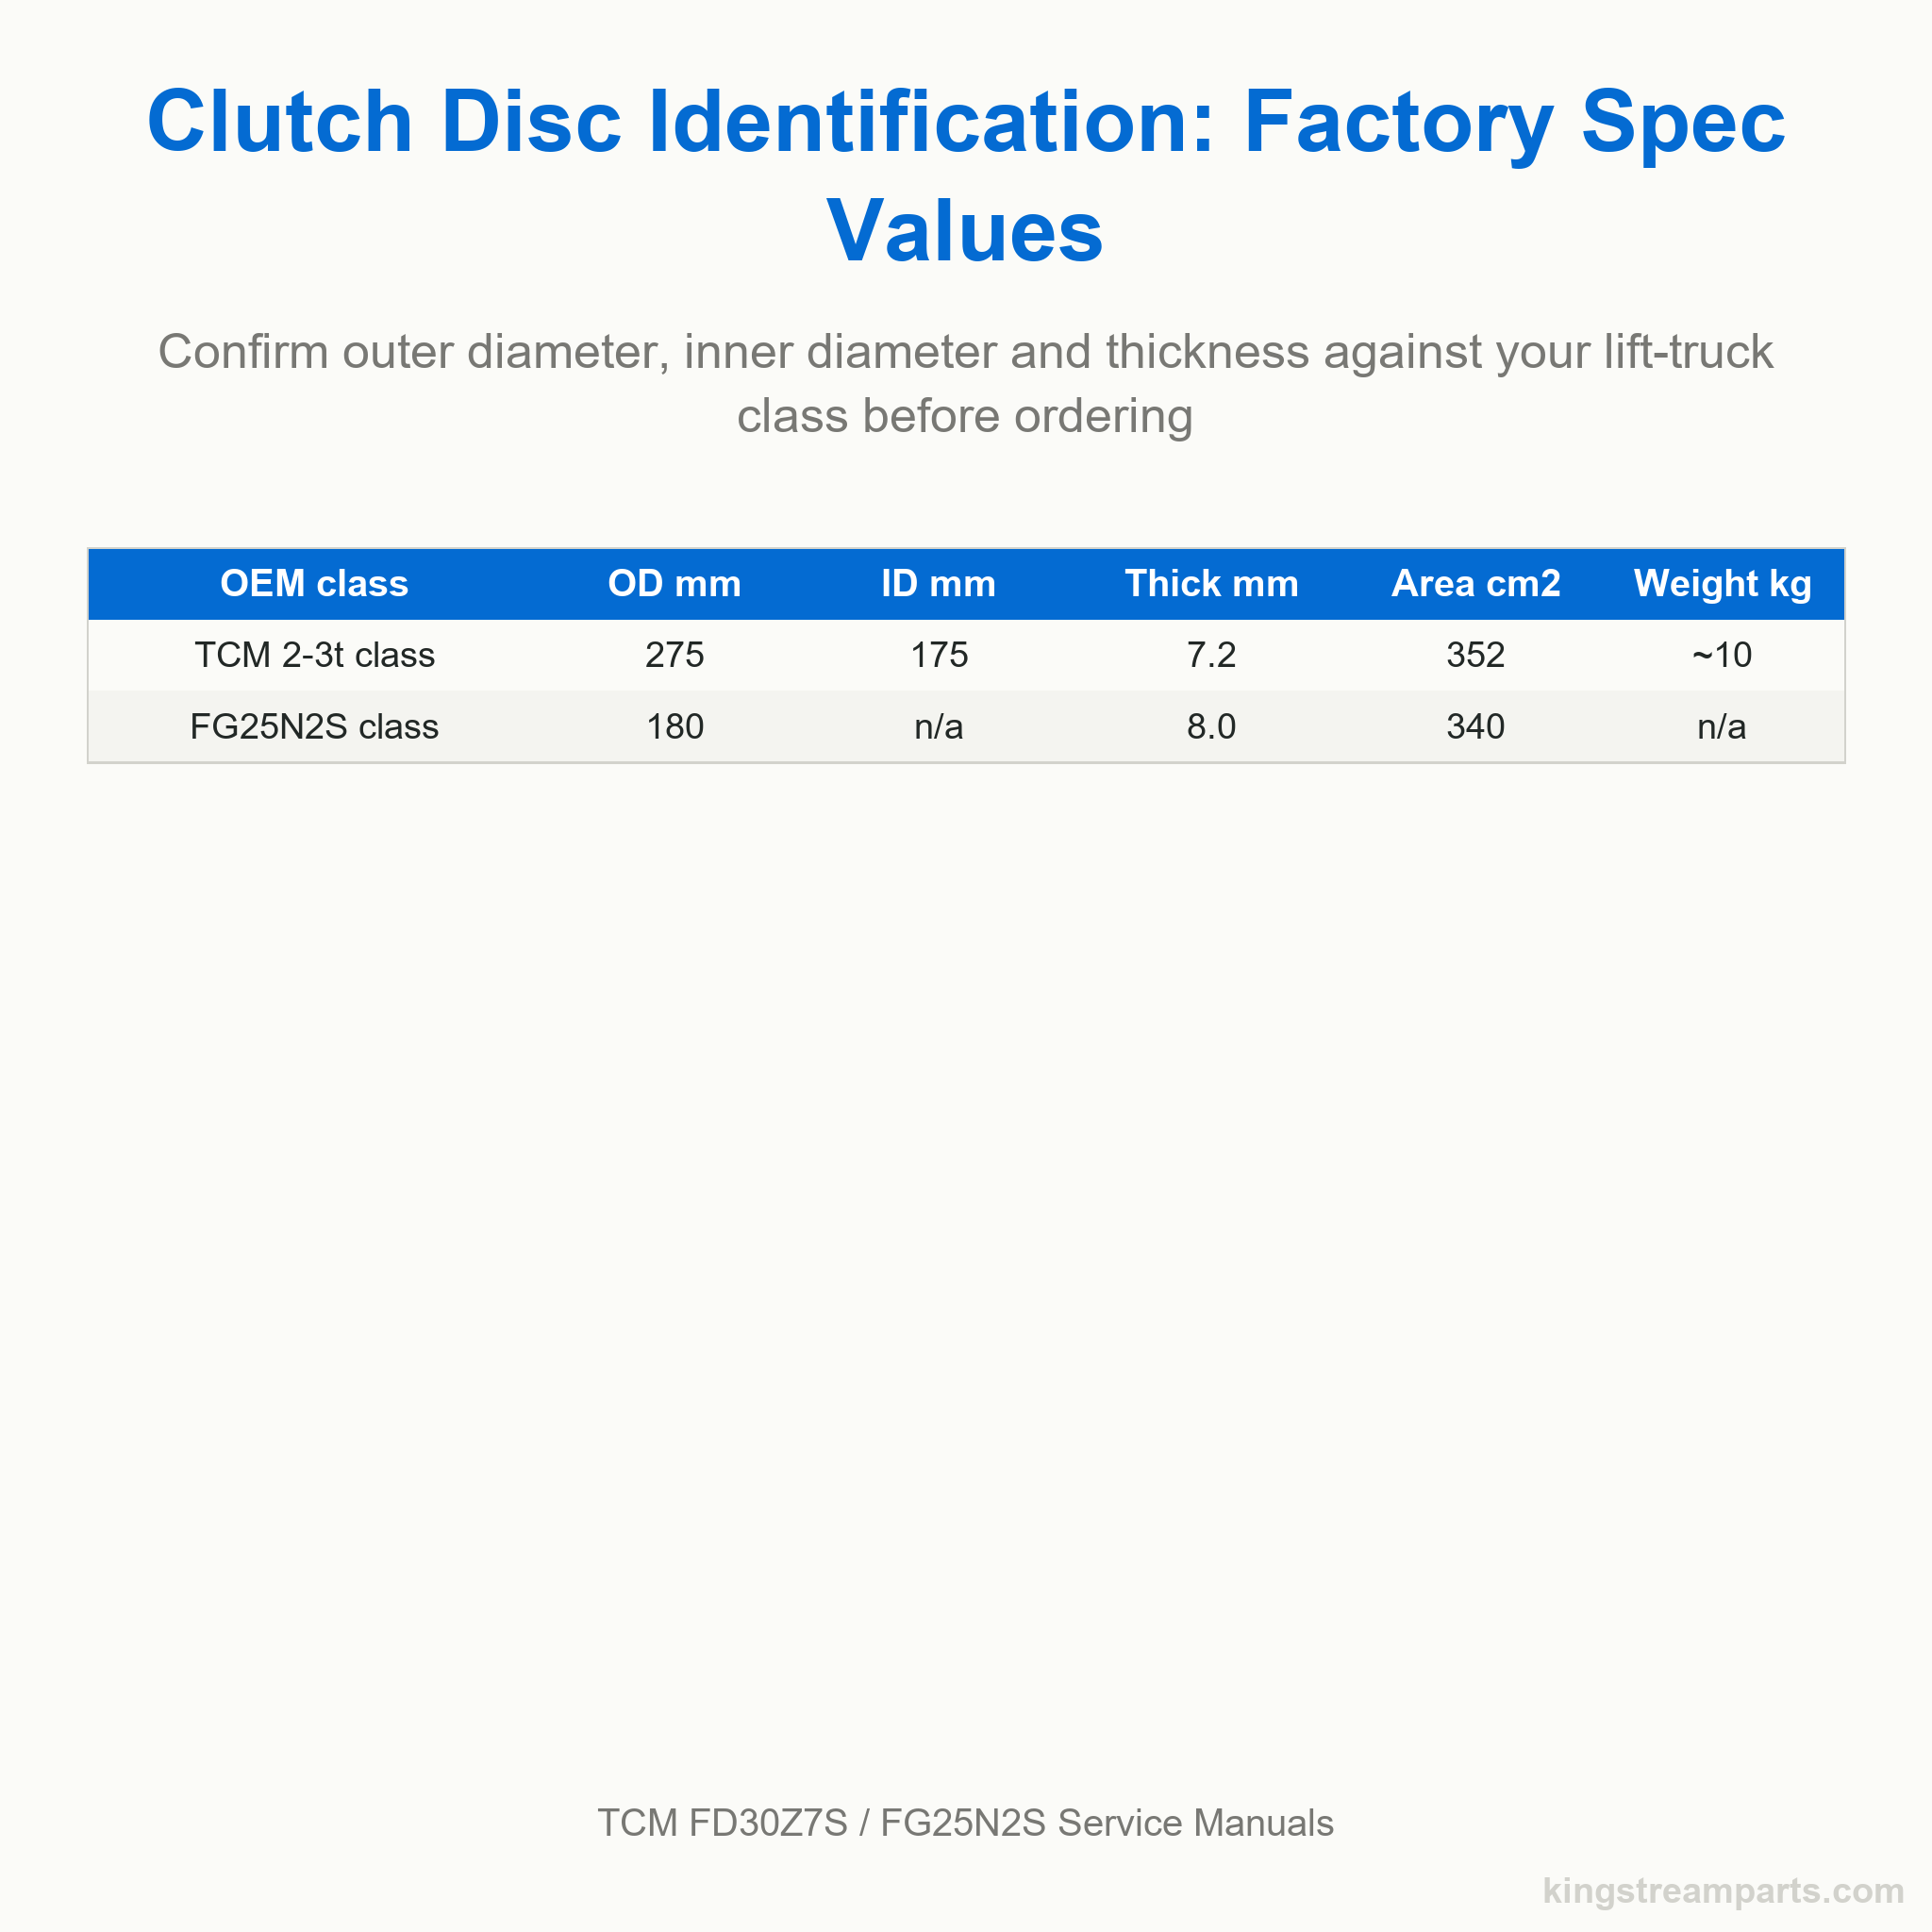
| Truck class | Disc OD | Hub ID | Thickness | Friction area | Weight |
|---|---|---|---|---|---|
| TCM 2-3t (FD30Z7S) | 275 mm | 175 mm | 7.2 mm | 352 cm² | ~10 kg (TCM, n.d.) |
| TCM FG25N2S | 180 mm | not stated | 8.0 mm | 340 cm² | not stated (TCM, n.d.) |
Real mismatch case: Komatsu FD25
In the shop we found this the hard way on a Komatsu FD25. A parts lookup returned a disc that looked right on paper: the friction diameter matched and the part number was close. It would not fit. We compared the hub spline count against the input shaft, and when we tried to seat it the disc would not line up. That is why spline count takes priority over the part number in clutch disc identification; diameter is only half the fitment.
Evidence: The TCM FD30Z7S manual lists the 2-3t-class disc at 275 mm OD, 175 mm hub ID, 7.2 mm thick, 352 cm² friction area, about 10 kg; the FG25N2S manual lists 180 mm OD, 8.0 mm thick, 340 cm² (TCM, n.d.). Both manuals identify a forklift clutch disc by measured dimension and spline, not by part number (TCM, n.d.).
Step 2: Prepare the Clutch With the No-Transmission Slide-Bolt Method
Yes, you can complete a forklift clutch disc replacement without removing the transmission. The slide-bolt method threads longer spacer bolts into the flywheel, holding the pressure-plate cover off the disc while the compression bolts come out (TCM, n.d.). The gearbox never bears down on the assembly (TCM, n.d.). The one prerequisite: a spacer kit that matches your flywheel bolt pattern. It is the method we use for most TCM-class trucks in our shop.
How the slide-bolt method avoids a transmission pull
A manual-transmission forklift’s clutch sits between the engine flywheel and the gearbox input shaft. Pulling the transmission means disconnecting drive shafts, unbolting the bellhousing, and supporting several hundred pounds. Thread spacer bolts into the flywheel first, then remove the cover’s compression bolts one at a time. The spacers carry the spring load, the disc drops free, and the transmission stays put.
Set the slide-bolt torque (TCM 10.9-12.1 kg-m)
The spacers are only as safe as their seating. The TCM FD30Z7S service manual calls for 10.9 to 12.1 kg-m on the slide bolts (TCM, n.d.).
Warning: Never exceed 12.1 kg-m on the slide bolts. Over-torquing can pull flywheel threads or distort the cover, and the spring load will fight you during removal (TCM, n.d.).
Evidence: The TCM FD30Z7S service manual specifies a slide-bolt torque of 10.9 to 12.1 kg-m for its no-transmission-removal clutch disc replacement procedure. Spacer bolts threaded into the flywheel hold the pressure-plate cover off the friction disc, so the gearbox never bears down on the assembly while the compression bolts are removed (TCM, n.d.).
Get started here
Because the spline count outranks the part number, a disc that looks right on paper can still refuse to seat. Send Kingstream the model, serial, and the dimensions you measured in this guide and the sourcing team cross-checks the build before quoting, across 14 major brands with OEM-compatible parts. Request a sourcing quote
Step 3: Remove the Clutch Cover and Disc
With the slide bolt set and spacers seated in Step 2, clutch cover removal comes down to four moves. This is the sequence the TCM FD30Z7S service manual documents, and the last time the clutch area is fully open before reassembly (TCM, n.d.).
Remove the compression bolts and spacers
Work in order and keep the pedal pressed.
- Press the clutch pedal and hold it to unload the pressure plate.
- Back off the slide bolt so the spacers carry the cover.
- Remove the cover compression bolts, diagonal pattern, so the cover lifts evenly.
- Lift the cover and spacers clear, then slide the disc off the input shaft splines.
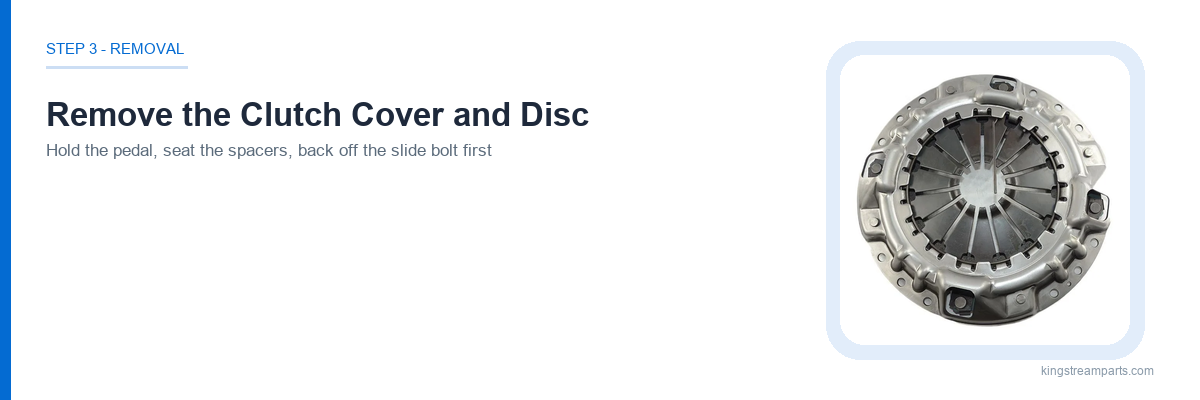
With the cover clear, the flywheel face and release bearing are exposed. That is where the next check belongs.
Inspect the release bearing while you’re in there
The release bearing, or throwout bearing, rides the clutch fork and wears alongside the disc. Spin it by hand while it is off the fork. Rough, noisy, or wobbly means replacement. The flywheel face gets the same look. Light glazing is normal, but scoring and cracks are grounds for replacement.
Replacing a rough bearing later means pulling the cover a second time. Checking it during clutch disc removal costs minutes and keeps the job to one pass.
Evidence: The TCM FD30Z7S service manual sequences the disc removal as: hold the clutch pedal down, seat the spacers with the slide bolts torqued to 10.9-12.1 kg-m, release the slide bolt, then remove the cover compression bolts and the disc. It also directs inspection of the release bearing and flywheel face while the cover is off, with the bearing replaced when it turns rough or noisy (TCM, n.d.).
Step 4: Install the New Disc and Torque to Spec
Once the old disc is out, the forklift clutch disc installation comes down to two things: orientation and torque. Get the orientation right and the clutch engages evenly; get it wrong and the job gets redone.
Spline boss toward the transmission
The single most common forklift clutch disc installation mistake is orientation. The disc carries a raised hub, the spline boss, on one face only. That face must point toward the transmission, so the friction linings seat squarely between the flywheel and the pressure plate.
Slide the disc onto the input shaft splines with the spline boss leading. If it catches, rotate it slightly rather than forcing it.
Diagonal, staged torqueing
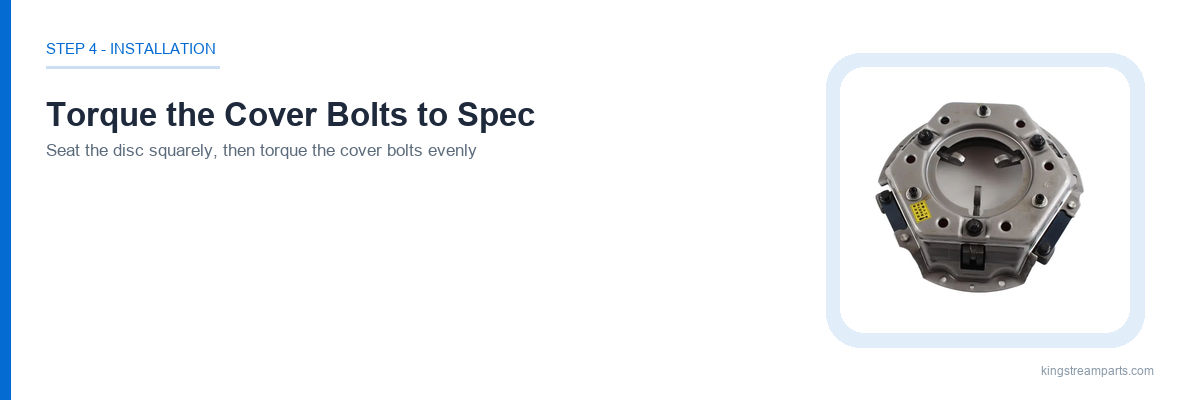
Refit the cover and hand-start the bolts. Torque the clutch disc cover bolts in a diagonal sequence, in stages: a first light pass around the bolt pattern, then a second pass at higher load, alternating across the cover. That staged pattern lets the pressure plate settle evenly and avoids distorting the cover. Finish with a torque wrench on the final pass, to the value your service manual specifies. One caveat: the torque and adjustment values in this guide come from the TCM and Toyota manuals, and they vary by make and model, so confirm each figure against your own truck’s service manual before you tighten.
Warning: The raised spline boss must face the transmission. Fit it backward and the hub can bind against the input shaft, so the clutch never releases cleanly. Confirm orientation before you torque any cover bolt.
Wear-limit checks before closing up (Toyota CL-17: rivet depth 0.3 mm, runout 0.8 mm)
Before the bell housing goes back on, run the Toyota CL-17 wear-limit checks on the replacement disc. Minimum rivet depth is 0.3 mm, and disc runout must not exceed 0.8 mm (Toyota, n.d.). Fail either check and the disc is distorted or worn past service life, so fit another one now, while access is still easy.
Evidence: The Toyota CL-17 workshop manual sets a minimum rivet depth of 0.3 mm and a maximum disc runout of 0.8 mm for a worn friction disc. Exceeding either limit means the disc is at end of life and must be replaced before the truck returns to service (Toyota, n.d.).
Step 5: Adjust the Pedal and Test for Slip
Forklift clutch pedal adjustment is the last mechanical task after a clutch disc replacement. Adjust pedal height and clutch pedal free travel to spec, then verify the new disc holds before any road test (TCM, n.d.).
Pedal height and free travel (120/113 mm, 40 mm)
On TCM-class trucks the factory spec is 120/113 mm for pedal height and 40 mm for free travel (TCM, n.d.). Free travel is the pedal slack before the release bearing loads. Too little keeps the bearing in constant contact. Too much prevents full release, causing drag and hard shifting. Adjust height first, then free travel, and recheck after the first few engagements.
The stall test
The stall test is the fastest confirmation that the disc grips. With the parking brake applied and the transmission in gear, raise the engine speed slightly. A healthy new clutch stalls the engine. A slipping clutch lets the engine keep turning, the surest sign it is going bad. Run the test under your site’s safety rules; in the US, ANSI/ITSDF B56.1, the Safety Standard for Low Lift and High Lift Trucks, is the standard that governs safe operation and maintenance of powered industrial trucks (ITSDF, 2020), and OSHA 29 CFR 1910.178, Powered industrial trucks, is the federal regulation that requires operator training and safe-operation practices for this equipment (OSHA, n.d.). Verify no slip, no harsh engagement, and normal free travel before clearing the truck.
- Step 1. Adjust pedal height to the 120/113 mm spec (TCM, n.d.).
- Step 2. Set free travel to 40 mm and confirm the release bearing loads at the end of the stroke (TCM, n.d.).
- Step 3. Apply the parking brake, engage a gear, and raise engine speed; the engine must stall.
- Step 4. Road-test for no slip, no harsh engagement, and normal free travel.
Evidence: The TCM FD30Z7S service manual specifies clutch pedal height at 120/113 mm and free travel at 40 mm for the manual-transmission class (TCM, n.d.). Factory procedure adjusts both to spec after reassembly, then verifies the disc through a stall test before the truck returns to service.
Forklift Clutch Disc Troubleshooting: Top 5 Problems
Most forklift clutch problems fit one of five patterns, each with a clear signature: a clutch slipping under load, hard shifting, a burning smell, grinding noise, or a high pedal engagement point. The cause usually sits in one of three components: the friction disc, the pressure plate, or the release bearing. Match your symptom to the table below, then confirm the diagnosis before ordering parts.
| Symptom | Likely cause | Fix |
|---|---|---|
| Clutch slipping under load | Worn friction disc, weak pressure plate, or oil contamination | Replace disc and pressure plate; fix the leak |
| Hard to shift gears | Dragging disc, wrong free travel, worn release bearing | Set free travel to 40 mm (TCM, n.d.); replace release bearing |
| Burning smell | Slipping generates heat; clutch over-stalled | Stop stalling; replace the glazed disc (Industrial Monitor Direct, n.d.) |
| Grinding noise | Worn release bearing or damaged input-shaft splines | Replace release bearing; inspect the splines |
| High pedal engagement point | Friction material thinned to the rivets | Confirm rivet depth; replace the disc |
Note: A wet-clutch disc is heat-sensitive. A stall held beyond 15 seconds, or a lining temperature above 230 F, can roughly halve friction-lining life (Industrial Monitor Direct, n.d.). If you smell burning, release the pedal immediately and let the clutch cool before retesting.
Evidence: Most forklift clutch problems trace to three roots: worn friction material, misadjusted release travel, or heat damage. The TCM service manual calls for 40 mm of pedal free travel; outside that window the clutch either drags and blocks shifting or slips under load (TCM, n.d.).
How Long Does a Forklift Clutch Disc Last, and What Does Replacement Cost?
A clutch disc is a wear item with no fixed replacement interval: its life varies with operator habits, average load, and clutch type, so most shops replace it on symptoms, not a fixed schedule.
Typical lifespan: no fixed interval
Light-duty use and gentle operator habits stretch the interval; heavy loads, wet-clutch stalling, and rider abuse shorten it sharply. Watch the four wear signals from Before You Start rather than the hour meter.
Cost and OEM vs aftermarket
Aftermarket discs run 20-50% cheaper on sticker price, but total cost of ownership dominates the real forklift clutch replacement cost: a premature failure pays the labor bill twice (Herculift, n.d.). See our OEM vs aftermarket forklift parts guide.
Kingstream warranty tiers
We back our parts by grade: OEM genuine parts carry a 12-month warranty, OEM-equivalent 6 months, aftermarket 3 months. We also stock 15 clutch-disc SKUs, 6 clutch assemblies, and 7 pressure plates: clutch disc, clutch assembly, pressure plate.
Evidence: A forklift clutch disc is a wear item with no fixed replacement interval. Because wear depends on operator habits, load, and clutch type, most shops replace the disc on symptoms rather than on a fixed hour-meter schedule.
Key Stats
- 10.9-12.1 kg-m slide-bolt torque, TCM FD30Z7S (TCM, n.d.)
- 20-50% cheaper aftermarket sticker, before TCO (Herculift, n.d.)
- 12 months OEM-genuine, 6 OEM-equivalent, 3 aftermarket
Further Reading
This guide covers the clutch disc itself, but the rest of the drivetrain deserves attention too. For more hands-on repair guidance, read our hydraulic cylinder replacement walkthrough and the preventive maintenance checklist to keep the whole machine healthy. If you are choosing between genuine and aftermarket parts, the OEM vs aftermarket comparison lays out the warranty and cost trade-offs. When you are ready to order, browse the clutch disc, clutch assembly, and pressure plate categories, or the wider mechanical transmission parts range.
FAQ
How long does a forklift clutch last?
A clutch disc is a wear item with no fixed replacement interval: life varies with operator habits, load, and clutch type. Replace it on symptoms, not an hour meter: slipping under load, a burning smell, a high pedal engagement point, or hard shifting are the signals to act on.
How do I know when a forklift clutch is going bad?
A forklift clutch is going bad when it slips under load, the pedal engages higher as the friction facing thins, a burning smell appears, or shifting turns hard and grinding. The stall test confirms the slip: with the brakes applied in first gear, engine RPM raised with no motion means the disc is not gripping (TCM, n.d.).
Can you replace a forklift clutch without removing the transmission?
Yes. The slide-bolt method threads spacer bolts into the flywheel to hold the pressure-plate cover off the disc while the compression bolts come out, so the transmission never has to be pulled. The one prerequisite is a spacer kit that matches your flywheel bolt pattern (TCM, n.d.).
How much does it cost to replace a forklift clutch disc?
Parts cost varies with grade. Aftermarket discs run 20-50% cheaper on sticker price, while OEM-genuine parts carry more upfront cost but a lower total cost of ownership, because a premature failure pays the labor bill twice (Herculift, n.d.).
What is the difference between a wet clutch and a dry clutch?
Evidence:
Dry single-plate friction clutches serve manual-transmission internal-combustion trucks; power-shift and automatic trucks use wet multi-plate packs, and electric trucks have no manual clutch. The procedure in this guide applies to the dry single-plate type, so confirm your truck’s clutch type before you start (Industrial Monitor Direct, n.d.).
How do I identify the correct clutch disc for my forklift?
Measure the outer diameter across the friction face with calipers, count the internal splines on the hub bore, and confirm the hub type. Spline count takes priority over the part number, because two discs for the same truck can carry different codes, and the stamped serial or production date lets a supplier cross-check the build (TCM, n.d.).
Is an OEM or aftermarket clutch disc better?
OEM-genuine parts carry a 12-month warranty and match the factory build, which makes them the safest fit. OEM-equivalent parts carry a 6-month warranty, and aftermarket parts 3 months at a 20-50% lower sticker price, so the right choice balances fit confidence against cost. See our OEM vs aftermarket comparison guide.
Conclusion
Diagnose the wear signals first, then confirm the replacement disc by spline count and outer diameter before you order. On TCM-class trucks the slide-bolt method lets you swap the disc without pulling the transmission, and the job finishes with pedal height and free travel set to spec. Torque the cover bolts in a staged diagonal pattern, and verify the new disc with a stall test before the truck returns to service. Keep the disc matched to the truck by serial or production date so the spline and hub align with the input shaft, and confirm the clutch is the dry single-plate type before you start.
References
- TCM. (n.d.). TCM FD30Z7S service manual: Clutch and clutch pedal. ManualsLib. https://www.manualslib.com/manual/3937265/Tcm-Fd30z7s.html
- Toyota. (n.d.). Toyota CL-17 clutch unit instructions. Manuals+. https://ja.manuals.plus/toyota/cl-17-clutch-unit-manual
- Industrial Monitor Direct. (n.d.). Forklift maintenance: Mechanical vs. electronic system reliability. https://industrialmonitordirect.com/blogs/knowledgebase/forklift-maintenance-mechanical-vs-electronic-system-reliability
- Herculift. (n.d.). OEM vs. aftermarket equipment parts: Which is better for you? https://www.herculift.com/oem-vs-aftermarket-parts-which-is-best-for-material-handling-equipment/
- ITSDF. (2020). ANSI/ITSDF B56.1-2020: Safety standard for low lift and high lift trucks. ANSI Webstore. https://webstore.ansi.org/standards/ansi/ansiitsdfb562020
- OSHA. (n.d.). 29 CFR 1910.178: Powered industrial trucks. Occupational Safety and Health Administration. https://www.osha.gov/laws-regs/regulations/standardnumber/1910/1910.178
Last reviewed and updated: August 2026. Author: Kingstream team. For tailored guidance, contact our team.